



In this article, the Hamming code is first built with seven coins and without a computer and tested practically. You will learn how test bits can detect errors in a transferred bit sequence and determine the faulty position. The procedure is then programmed in a Jupyter notebook with Python.
If data is changed on the go
When transmitting digital data, it can happen that individual bits change. A 0 becomes a 1 or vice versa, without the recipient noticing this at first. The Hamming code therefore supplements the actual data with additional check bits. In this way, it is not only possible to see that an error has occurred, but also where it is located.
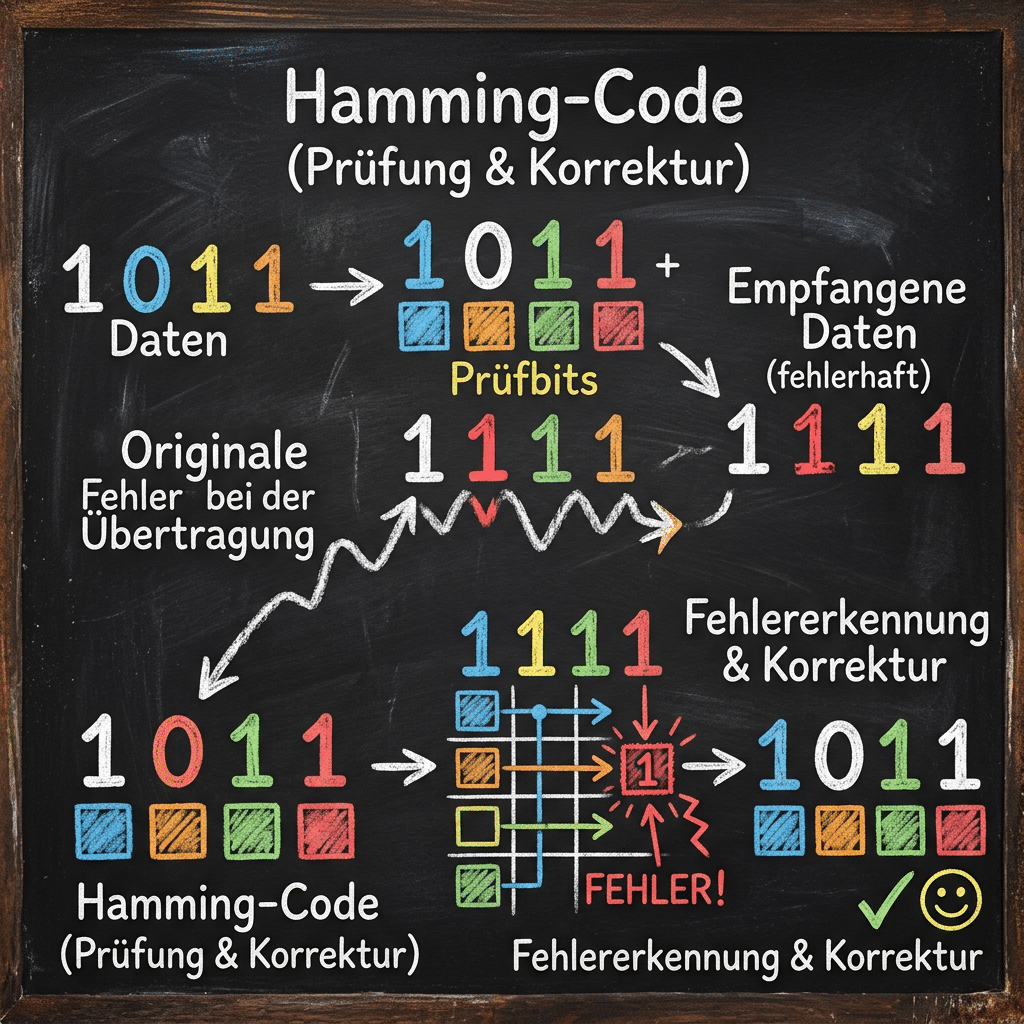
Building the Hamming Code
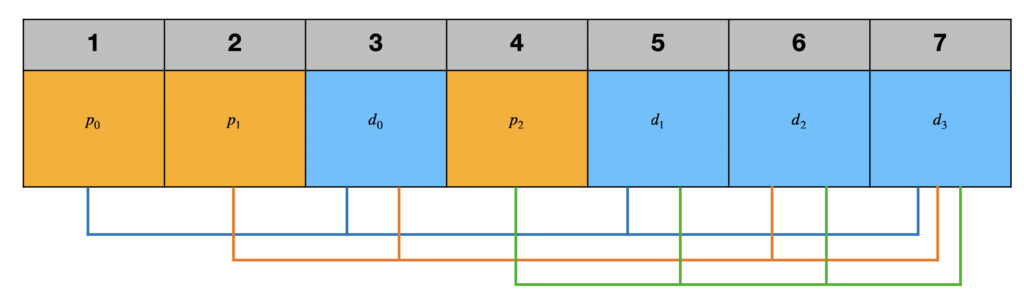
The Hamming code consists of seven bits in the variant used here: four data bits and three check bits. The data bits are at positions 3, 5, 6 and 7, while the test bits are placed at positions 1, 2 and 4. Each test bit controls a specific group of four positions and is chosen so that this group contains an even number of ones. If a bit is changed later, the pattern of the faulty checks shows the position of the wrong bit.
Material: Hamming code with coins
Seven Hamming coins and a suitable template are required for the implementation. The coins are intended for 3D printing; the print files are available as a ZIP file in STL and 3MF format for Download.

The template with the positions and test groups can be downloaded as PDF file and printed.
Seven coins are needed to build the Hamming code. The four data bits to > are represented by blue coins, the three test bits Each coin shows a 0 on one side and a 1 on the other side.
First, place the four blue data coins in positions 3, 5, 6, and 7. Randomly choose one side for each coin and use it to record the data bits through .

The three orange test coins are then placed on positions 1, 2 and 4.
Each parity bit checks a specific group of positions. checks positions 1, 3, 5, and 7, checks positions 2, 3, 6, and 7, and checks positions 4, 5, 6, and 7.

Choose the sides of the orange coins so that there is an even number of A's in each of these test groups. The respective test bit is always counted.
This builds up a valid Hamming code. The seven coins now contain four data bits and three check bits. If a coin is later turned over, the test groups can be used to determine whether an error has occurred and in which position the changed bit is located.
Detect, locate and correct errors
After the Hamming code has been built on the template, first check whether each of the three parity groups contains an even number of ones. covers positions 1, 3, 5, and 7, covers positions 2, 3, 6, and 7, and covers positions 4, 5, 6, and 7. The respective parity bit is included in the count during the check.

Now any coin is secretly turned over. Subsequently, the three test groups are checked again. If a test group contains an odd number of As, this shows that there is an error in one of the associated positions.
The pattern of the faulty parity groups ultimately reveals the exact position of the changed bit. For example, if the parity groups of and are faulty, the error is at position 3, since this position is included in both parity groups.

If no faulty test group is found, no coin has been changed. If the faulty position is determined, the corresponding coin is turned over again. This corrects the single bit error and restores the original Hamming code. Subsequently, it can be investigated how the method behaves with several simultaneously modified bits.
Limits of the procedure
The Hamming code can detect, locate and correct a single bit error in this form. However, if several bits or number spinns are changed at the same time, reliable error correction is no longer guaranteed.

Three test views show the way to error
The procedure works because each of the seven positions has its own three-digit binary representation: position 1 corresponds to 001, position 2 to 010, position 3 to 011, and so on up to position 7, which corresponds to 111. The three parity bits each check one digit of these binary representations. checks the last digit, checks the middle digit, and checks the first digit.
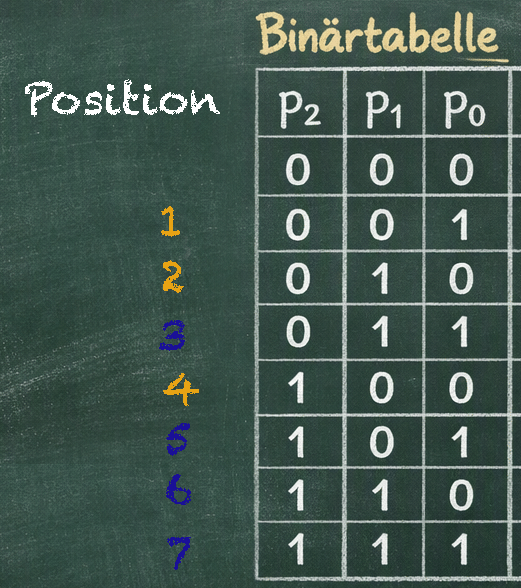
If a coin is flipped, the number of ones changes in exactly those parity groups that include its position. The affected parity groups therefore provide the individual digits of the binary representation of the error position. For example, if and are faulty, while remains correct, the result is 011 — the binary representation of position 3.
The three test results thus together form a so-called test pattern. This test pattern is nothing more than the binary number of the faulty position. Therefore, the Hamming code can not only detect a single bit error, but also clearly locate it and correct it by turning the corresponding coin over again.
Implementation with Python
The procedure previously carried out with coins and the template can also be implemented with Python. In a Jupyter notebook, the data bits, check bits and check groups are represented by lists and calculations.
Subsequently, a single bit error can be simulated, located on the basis of the test sample and automatically corrected. The Jupyter Notebook to Hamming-Code contains the corresponding Python implementation and can be run directly in the browser.
Hamming code with more bits
The Hamming code can also be extended to longer bit sequences.
For this purpose, additional test bits are inserted at the positions that correspond to powers of 2, i.e. at positions 1, 2, 4, 8, 16 and so on. The more data bits are transferred, the more test bits are required: For example, a 15-bit code with four check bits are created from 11 data bits, and a 31-bit code with five check bits is created from 26 data bits.

Even with these longer codes, the test results can form the binary representation of the faulty position, so that a single bit error can be detected and corrected.
Result
The Hamming code clearly shows how additional test bits help to detect and correct errors in digital data. With the 3D-printed coins, the procedure can initially be built up without a computer and can be traced practically.

The subsequent implementation in the Jupyter Notebook demonstrates how this unplugged method can be transformed into an algorithm that automatically locates and corrects errors.
Leave a Reply